
How to Create an SOP in ProcessMaster
How to Create and Edit an SOP in ProcessMaster
ProcessMaster makes it easy to generate a Standard Operating Procedure, refine it, and save it for your team to use later. You can start from a simple prompt, or provide more context with photos, videos, or supporting documents.
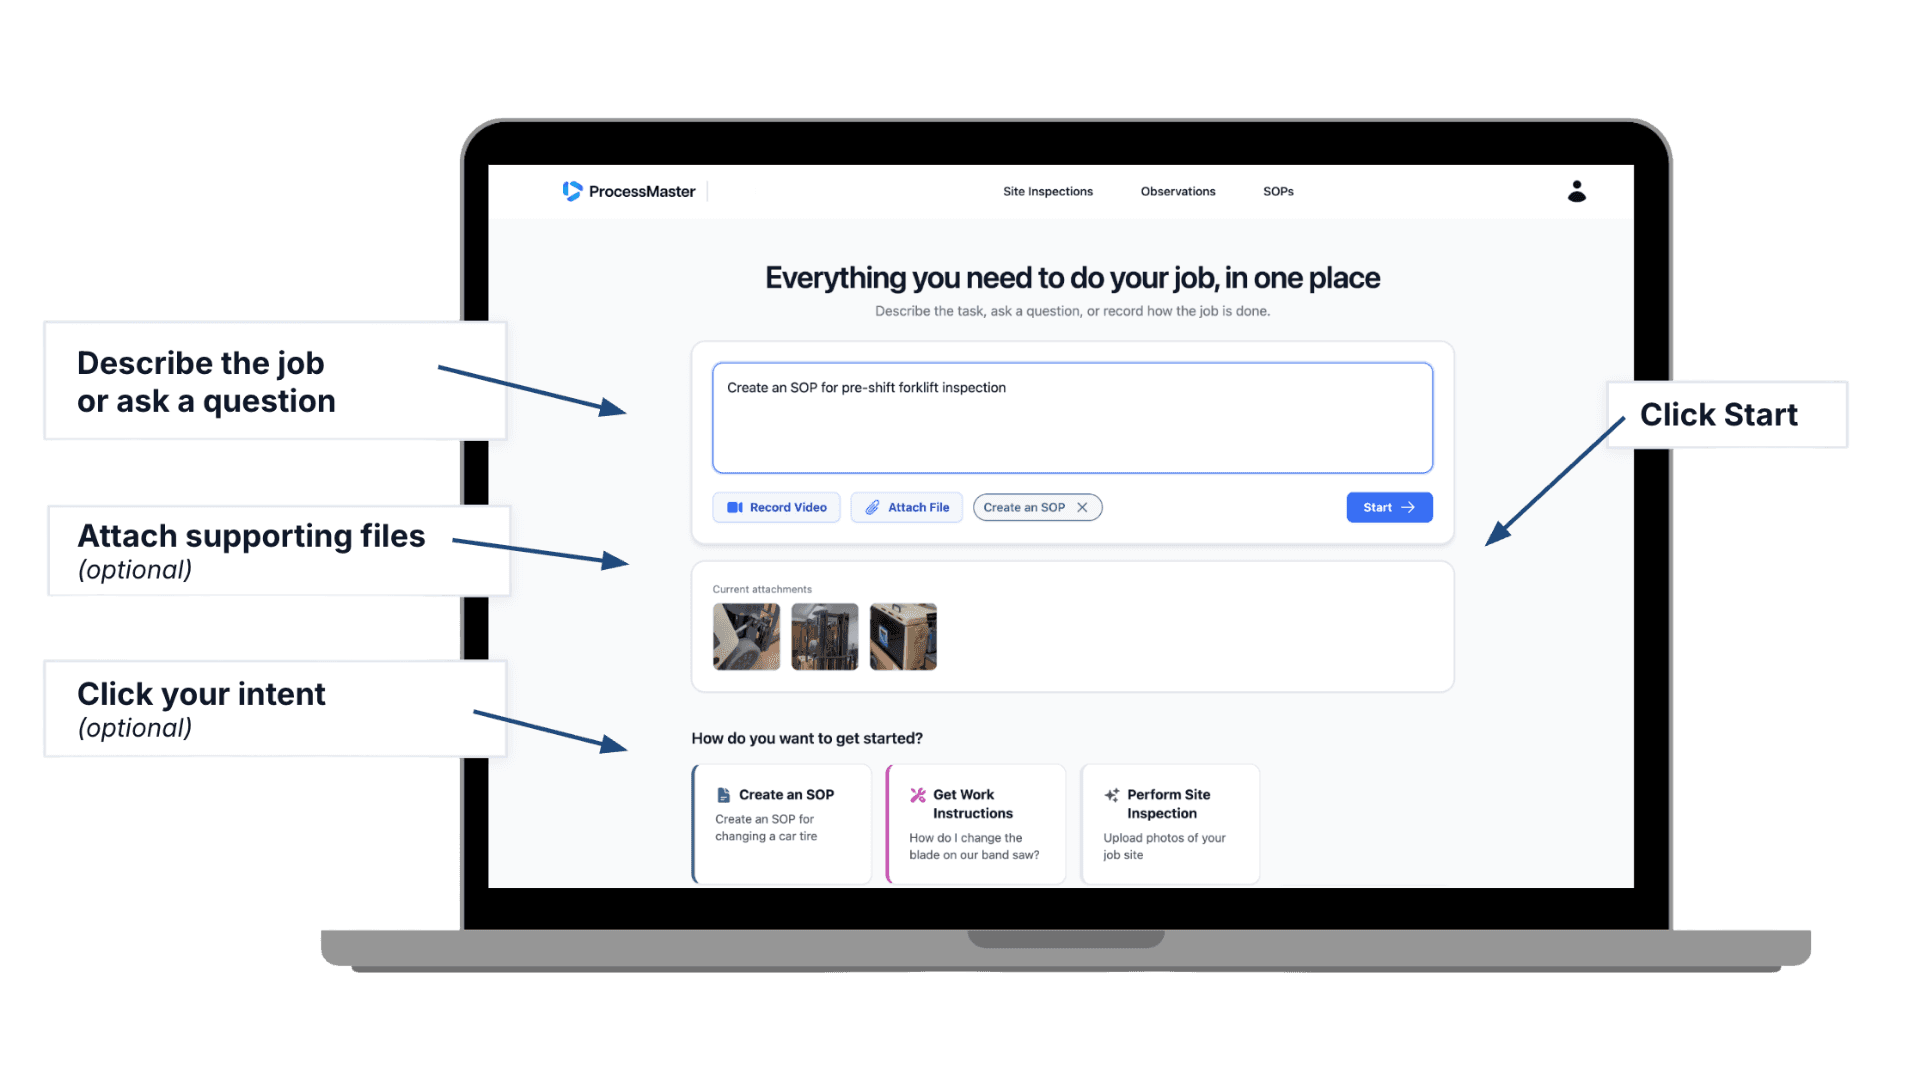
1) Start a new SOP
From the home screen, you can create an SOP in a few different ways:
Type a simple prompt describing the task
(optional) Attach photos to show the equipment, site, or work area
(optional) Record a video explaining the task
(optional) Upload supporting documents such as manuals, work instructions, or reference files
Click the Create an SOP intent card to indicate that you want to generate an SOP report
Once you’ve added your prompt and any supporting information, click Start.
Example prompts:
“Create an SOP for pre-shift forklift inspection”
“Create an SOP for onboarding a new employee”
“Create an SOP for rooftop HVAC preventive maintenance”
2) Review the generated SOP
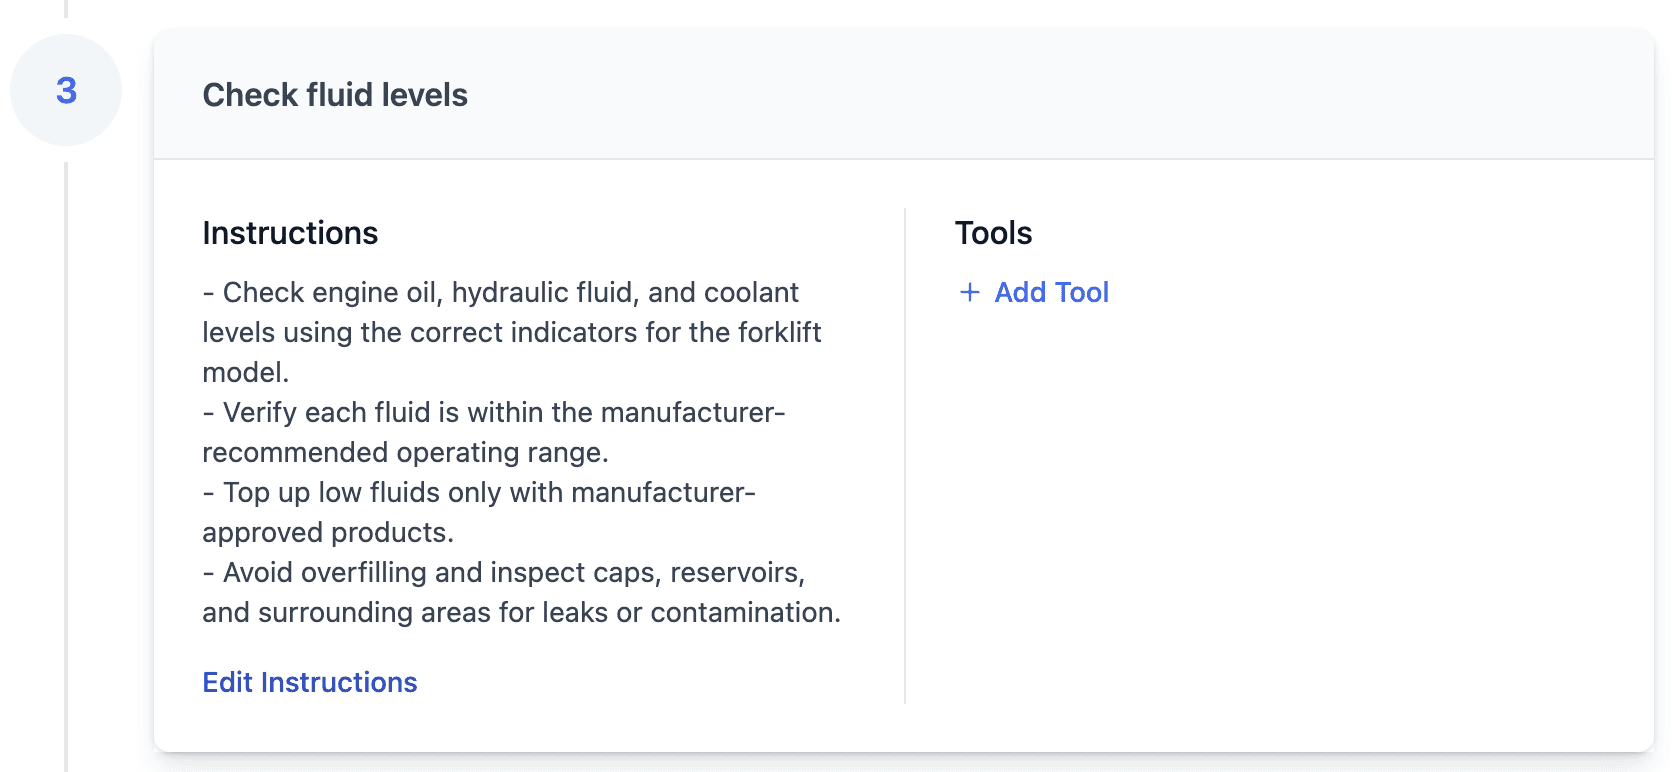
ProcessMaster will generate a structured SOP draft with:
Steps
Instructions
Tools
Review the draft to make sure it reflects the job accurately before sharing it with your team.
3) Edit the SOP in chat
One of the easiest ways to refine the SOP is to simply ask the chat to make a change.
You can type requests such as:
“Add a lockout/tagout step before maintenance begins”
“Add more detail to step 2”
“Replace ‘technician’ with ‘operator’ throughout”
“Include required PPE for each step”
ProcessMaster will update the SOP draft in-chat so you can quickly make changes without rewriting the document manually.

Suggested note:
This is a great option when you want to make broader edits or describe changes in plain language.
4) Directly edit steps, instructions, and tools
You can also make precise edits directly in the SOP itself.
To edit any part of the SOP:
Hover over a step, instruction, or tool
Click the pencil icon to edit
Click the plus icon to add a new item
Click the trash can icon to remove an item
This lets you quickly fine-tune the SOP line by line.

You can directly:
Edit a step title
Update instructions
Add or remove tools
Insert new steps
Delete content that doesn’t apply
5) Save the SOP
Once your SOP looks right, click Save to publish it to your team library.
Saving the SOP makes it available for your team to reference later in the SOP Library.
6) Download the SOP report
After saving, you can also download the SOP as a report/PDF for sharing, printing, or recordkeeping.
Use the Download SOP PDF option in the SOP view.

This is helpful when you need to:
Share the SOP outside the platform
Print a copy for the field
Keep a documented version for internal use
Tips for best results
Be specific when describing the task
Include equipment, site, or process details when possible
Add supporting photos, videos, or documents if available
Review the AI-generated output before publishing
Use chat edits for broader changes and direct edits for quick line-by-line updates
Need help?
If you have questions or need support, contact support@processmaster.ai.